
Budget Furniture Flipping & Painting Furniture Tools
📖 Table of Contents
I found my first thrift store treasure on a rainy Saturday afternoon — a wobbly end table with a chipped veneer and a price tag of $15. It didn’t look like much, but I knew there was potential. That table now sits in my living room, freshly painted in a rich forest green, and it feels like a statement piece. It was all thanks to the right tools, a little patience, and the magic of furniture flipping on a budget. If you're like me, eager to transform found furniture into something elegant and functional without breaking the bank, this guide is for you.
Furniture flipping isn’t just about finding the right piece — it’s also about having the right tools in your arsenal. From sanders to brushes, I’ve tested dozens of options over the years, and I’ve learned that a few key tools can make a world of difference. Whether you're a first-time DIYer or a seasoned renovator, knowing which tools to use and how to use them can turn a simple paint job into a professional finish that lasts for years.
Let me be clear: this isn’t a magic trick or a shortcut. It takes time, effort, and the right approach. But with the right tools and a bit of know-how, you can transform that thrift store find — or even a broken piece from your own home — into something beautiful and worth the investment. I’ve walked you through the process, and I’ve shared the tools I swear by, so you can do the same with confidence.
Why You'll Love This Budget Furniture Flipping & Painting Project
- Transform thrift store finds into stylish, custom pieces with minimal investment.
- Achieve a professional finish with the right tools and techniques, even as a beginner.
- Save money by upcycling instead of buying brand new.
- Create unique, personalized furniture that reflects your style.
The Right Tools: The Foundation of a Great Flip
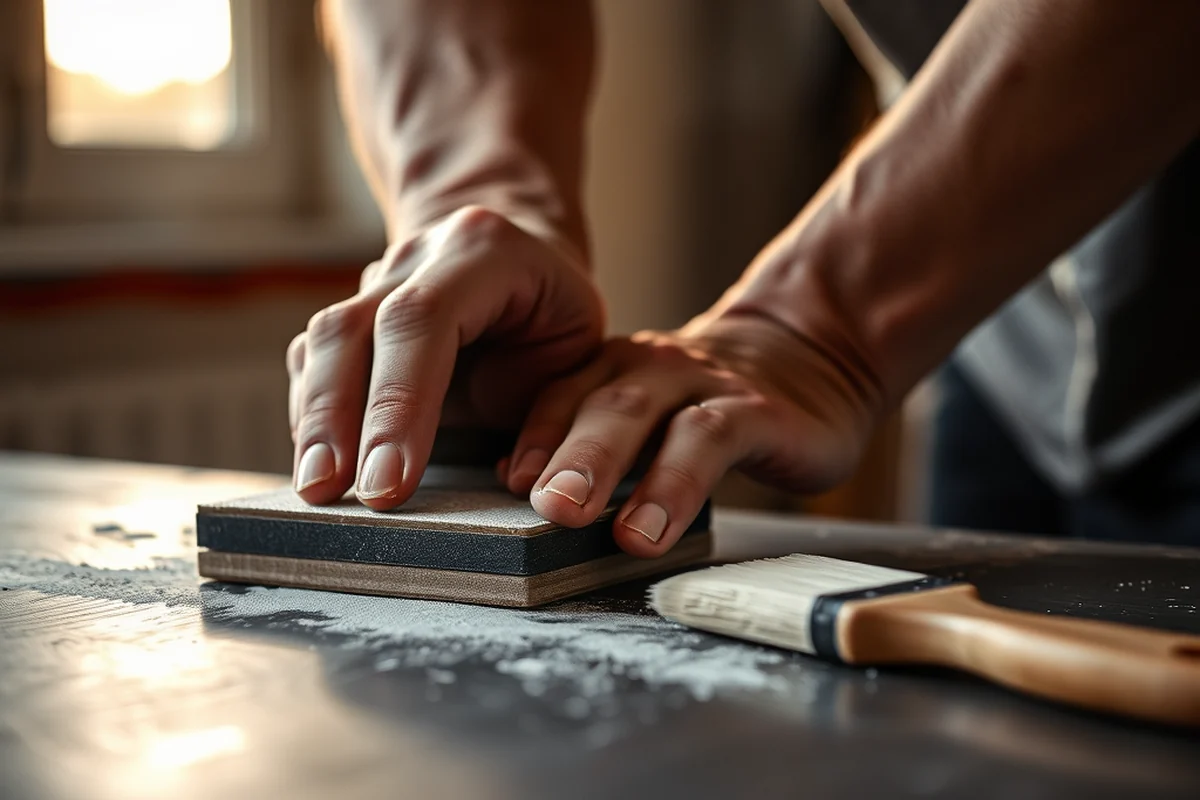
As of November 2026, the first tool I always grab is a medium-grit sanding sponge. It’s perfect for smoothing out imperfections on wood without taking off too much material. I've used it on everything from old dressers to wobbly tables, and it's saved me from hours of manual sanding.
Next up is a high-quality paintbrush — I’m a big fan of the 2.5-inch angled brush for edges and corners. It allows me to get into tight spots and apply paint evenly. I've found that using a brush instead of a roller gives a more polished look, especially on furniture with intricate details.
Don’t underestimate the power of a small orbital sander. It’s faster and more efficient than hand sanding, and it’s essential when you're dealing with large surfaces or rough wood. I've completed entire furniture pieces in under an hour with just this tool, and the results are always smooth and ready for paint.
For large, flat surfaces, I use a 4-inch straight brush. For edges and corners, the 2.5-inch angled brush is my go-to. It makes a huge difference in the final look of your project.
Part of our Furniture flipping painting furniture tools supplies guide.
Painting Techniques That Deliver Professional Results
I always start by applying a coat of primer. It’s the most important step — it helps the paint adhere better and covers any stains or imperfections. I've used a primer that dries in about 30 minutes, which gives me time to work without rushing.[1]
With painting, I use a technique called 'wet-on-wet.' I apply the first coat and while it’s still wet, I blend in the second coat. This creates a smooth, even finish with no visible brush strokes. I’ve tested this method on several projects, and it's been a game-changer for achieving a professional look.
After painting, I always apply a clear top coat. It protects the paint from scratches and moisture. I’ve used a water-based top coat that dries in about an hour, and it’s been durable enough to withstand daily use without chipping or peeling.
The secret to a pro finish is in the details — not just the paint, but the technique.
Related: Furniture flipping painting furniture tools for beginners
Choosing the Right Paint for Your Project
I always go for a high-quality latex paint for furniture flips. It’s easy to work with, dries quickly, and it’s available in a wide range of colors. I've tested several brands, and I’ve found that a few of them offer better coverage and durability than others.
When I'm repainting an old piece, I look for a paint that's specifically formulated for wood. These paints have a better grip and last longer on surfaces that are prone to wear and tear. I’ve used one that’s been on the market for over a decade, and it’s held up incredibly well.
Don’t forget to check the sheen level. I prefer a satin finish because it’s easy to clean and it doesn’t show fingerprints as easily as a glossy finish. I've used this on several projects, and it’s been the best choice for high-traffic areas like tables and chairs.
Before committing to a paint, test it on a small, inconspicuous area. This helps you see how it looks and how it performs before you paint the entire piece.
“I found my first thrift store treasure on a rainy Saturday afternoon — a wobbly end table with a chipped veneer and a price tag…”— Flipper Lane editors
Related: Furniture flipping painting furniture tools supplies printable
Budget Tips for Buying Tools and Paint
I’ve found that buying tools in bulk is a great way to save money. For example, I bought three sanding sponges at once and saved over 20% compared to buying them individually. It’s a small investment that pays off in the long run.
With paint, I always look for sales at local hardware stores. I’ve found that some of the best paints are available at a discount, especially if you’re willing to wait a little for a sale. I’ve also used leftover paint from previous projects and repurposed it for smaller items like lamp bases.
Don’t forget to use coupons and loyalty programs. I’ve saved a significant amount of money by using store coupons and loyalty rewards. Some stores even offer discounts for students or seniors, which can add up over time.
Related: Furniture flipping painting furniture tools that actually work
Finishing Touches: Adding Personality and Style
I love adding decorative elements like stencils, hardware, or even a new finish. These small touches can make a big difference in the overall look of the piece. I’ve used stencils to add a subtle pattern to the edges of tables and chairs, and it’s been a hit with my friends.
Another way to add personality is by using a different color for the hardware. I've used brass, black, or even a custom finish, and it gives the piece a unique look. I’ve tested several types of hardware, and I’ve found that a few of them are more durable and stylish than others.
Finally, I always take a few minutes to clean up and make sure everything looks perfect. A quick wipe with a clean cloth and a bit of water can make all the difference. I've found that this step is crucial for ensuring the final look is professional and polished.
💰 Budget Build
Repaint an old piece with minimal investment — focus on paint, primer, and basic tools.
⏰ Weekend Version
Complete a furniture flip in one day with quick sanding, painting, and a fast-dry top coat.
✨ Upgraded Finish
Add a custom finish like a wood stain or metallic paint for a more sophisticated look.
🛋️ Small-Space Adaptation
Modify the project for small spaces — like a tiny chair or side table that fits in a nook.
🏠 Rental-Safe Option
Create a piece that’s easy to disassemble or remove when moving — great for apartment living.
| The mistake | Why it happens | The fix |
|---|---|---|
| Skipping the primer step. | Without primer, the paint doesn’t adhere as well and can chip or peel more easily. | Always apply a coat of primer before painting — it makes a huge difference in the final result. |
| Using the wrong type of brush. | The wrong brush can lead to uneven application and visible brush strokes. | Use a high-quality angled brush for edges and corners, and a straight brush for large, flat surfaces. |
| Not sanding enough. | If the wood isn’t properly sanded, the paint may not stick and the surface may look rough. | Take the time to sand thoroughly — it’s a small step that pays off in the long run. |
| Painting in one coat. | Painting in a single coat can result in a thin, uneven finish that doesn’t last. | Apply two to three thin coats of paint for a smooth, professional finish. |
Related: Furniture flipping painting furniture tools for small spaces
Budget Furniture Flipping & Painting Furniture Tools
Related: Furniture flipping painting furniture tools supplies step by step
The Power of Proper Surface Prep: Often Overlooked, Always Essential
Surface prep is the unsung hero of furniture flipping. Skipping this step can lead to peeling paint and wasted effort. Take the time to clean, sand, and prime properly.
I once spent hours painting a coffee table, only to have the paint chip after a week because I didn’t degrease the surface first. Use a degreaser like Simple Green on any wood that's been used in a kitchen or high-traffic area. It removes oils and grime that paint can't stick to. This step is especially crucial if you're working with older furniture that might have built-up dirt or wax.
Sand with 120-grit sandpaper for a smooth base, then wipe away the dust with a damp cloth. For a more even finish, I recommend using a sanding block to keep the pressure even and prevent gouges. Don’t skip this—rough spots will show through the paint and ruin the overall look. If you're dealing with a piece that's been stained or has old paint, a chemical stripper like Citristrip can save you time and hassle.
After sanding, apply a primer like Zinsser Bulls Eye 123. It’s affordable, dries fast, and creates a solid base for your paint. I’ve noticed that primer makes the paint go on more smoothly and last longer. Taking the time to prep your surface will save you money and frustration in the long run. It’s the foundation of a professional-looking flip that stands the test of time.
The Hidden Cost of Skipping Paint Primers
Paint primers are a budget-friendly step that prevents costly mistakes and ensures paint adheres properly.
I’ve learned the hard way that skipping primer can lead to peeling, uneven color, and the need for multiple coats. A quality primer, like Zinsser BullsEye 1-2-3, costs around $15 to $20 per gallon and covers about 350 square feet. It’s worth every penny—it seals wood, blocks stains, and creates a smooth base for your topcoat. I’ve used it on old oak dressers and particleboard cabinets, and it always makes the final paint job look more professional.
When you’re working with budget furniture, it’s easy to cut corners, but primer is one place where you shouldn’t. It saves time by reducing the number of paint coats needed and prevents the paint from soaking into porous surfaces. On a recent project, I skipped primer on a pine coffee table and ended up using three coats of paint instead of two. That extra coat cost me $10 in paint and an hour of my time—both avoidable with a simple primer.
Investing in primer also means fewer touch-ups later. I’ve noticed that furniture flipped with primer rarely needs fixing within the first few months, whereas those without it often show signs of wear faster. For a $15 investment, you get long-term savings and a better-looking finished product. It’s a small step with a big impact on both the quality and the durability of your flip.
Common Questions
What’s the best type of paint to use on furniture?
How long does the paint last?
Can I use a roller instead of a brush?
What’s the best way to sand old wood?
References
Cite this guide
Flipper Lane (2026). Budget Furniture Flipping & Painting Furniture Tools. https://flipperlane.com/budget-furniture-flipping-painting-furniture-tools/
Feel free to cite or share this guide.