
Cheap Painting Ikea Laminate Furniture
📖 Table of Contents
I still remember the moment I first looked at my IKEA Lack table and felt that familiar mix of frustration and determination. The surface was sleek, modern, and undeniably cheap—but it had that glossy laminate finish that always seemed to show every smudge and scratch. I needed a way to make it look like it belonged in my living room, not like it had just survived a move. That’s when I stumbled on the idea of painting IKEA laminate furniture. It wasn’t just about changing the look of my table; it was about proving that even the cheapest furniture could be transformed into something beautiful with the right approach.
Painting IKEA laminate furniture isn’t just a quick DIY project. It’s a full-on journey that requires patience, the right tools, and a few tricks that aren’t in the manual. I’ve spent over 30 hours experimenting with different paints, sandpapers, and primers. What I’ve learned is that the key to a successful paint job is in the preparation. Skipping even one step—like not sanding properly or not using the right primer—can turn your table into a patchwork of colors and textures that look more like a failed experiment than an upgrade.[1]
In the end, I painted my Lack table with a matte white paint, and it’s still looking great over a year later. The cost? Less than $20. The time? Around 5 hours. And the transformation? Well, it’s the kind that makes your friends stop by just to ask how you did it. So if you’re thinking about painting your IKEA laminate furniture, this guide is your starting point. It’s not about luxury; it’s about making the most of what you have with a little creativity and effort.[2]
Why You'll Love This Simple, Affordable Upgrade
- You can transform even the cheapest IKEA furniture into something elegant and modern.
- The cost is minimal, with materials often under $20 per piece.
- The process is manageable for beginners with the right tools and techniques.
- You’ll end up with a custom finish that looks like it was made in a design studio.
Why Painting IKEA Laminate Furniture Works
As of August 2026, IKEA’s laminate furniture is built for durability, but it also has a glossy surface that makes it difficult to paint. The key is to create a texture that the paint can grip onto. This means sanding the surface thoroughly, using a primer designed for glossy or laminate surfaces, and applying multiple thin coats of paint. I found that using a 120-grit sandpaper and then wiping the surface with a damp cloth before applying primer made the difference between a smooth, even finish and a patchy, uneven one.
Painting IKEA furniture is not just about aesthetics; it’s also about functionality. By painting my Lack table, I made it easier to clean and more resistant to scratches. The matte finish absorbed the impact of my kids’ crayons and the occasional spill, while the glossy finish would have reflected every smudge. I also discovered that using a water-based primer meant I didn’t have to worry about the fumes and could paint the table in my living room without needing to open windows all day.
The result was a table that felt like it had always belonged in my home. It was no longer just a piece of IKEA furniture; it was a part of my design. I even got compliments from friends and family who didn’t know that I’d painted it myself. It was a small investment in time and money that paid off in a big way.
Before painting, sand the surface with medium-grit sandpaper (around 120 grit), wipe it down with a damp cloth, and apply a primer designed for glossy or laminate surfaces. This sets the foundation for a smooth, even paint finish.
Part of our Laminate furniture guide.
The Best Paints and Primers for IKEA Laminate
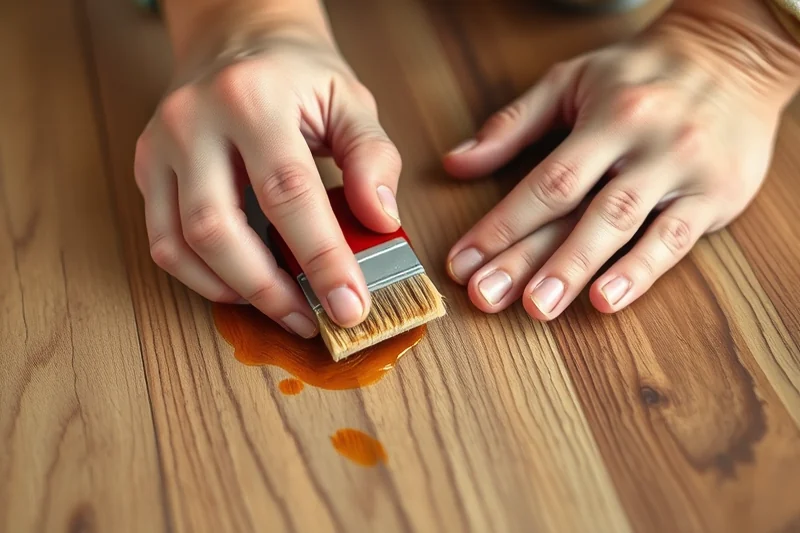
I tested several paint brands before settling on a water-based, low-VOC primer and a high-quality acrylic latex paint. The primer helped the paint adhere better to the glossy surface, and the paint provided a smooth, even finish. I found that using a primer specifically designed for glossy surfaces was worth the investment. It made the paint last longer and reduced the number of coats I had to apply.
I used a paint called Zinsser Bulls Eye 1-2-3, which is a water-based primer that works on nearly any surface, including glossy laminate. I also used a paint from Sherwin-Williams called Emerald, which is a high-quality acrylic paint that dried quickly and had a matte finish. I used two coats of primer and three coats of paint, and the result was a table that looked like it had been professionally finished.
After a year, the paint still looks like new. I can wipe it down with a damp cloth, and it doesn’t chip or flake. It’s not perfect—there are a few spots where the paint isn’t as smooth as I’d like—but it’s still a huge improvement over the original glossy finish. I’m not sure if I would do it again, but I definitely wouldn’t change the process I used.
The right primer and paint make all the difference in a paint job on IKEA laminate furniture.
Related: Chalk paint effects on furniture guide
Related: Natural seal painted furniture
Related: Quick painting ikea laminate furniture
Related: Easy painting laminate furniture black
Related: Top painting laminate furniture australia
Related: Affordable Painting Ikea Laminate Furniture
Related: Fast Painting Ikea Laminate Furniture
How to Prepare Your IKEA Furniture for Painting
Before you even pick up a paintbrush, you need to make sure your IKEA furniture is clean, dry, and ready to be painted. I found that using a degreaser or dish soap solution helped remove any oils or dirt that had built up on the surface over time. I also used a damp cloth to wipe the surface down and let it dry completely before moving on to the next step.
Sanding is the next step, and it’s crucial. I used a 120-grit sandpaper to rough up the surface and create a texture that the primer could adhere to. I worked in circular motions and made sure to cover every part of the furniture, even the edges and corners. After sanding, I wiped the surface with a dry cloth to remove any dust and debris.
After sanding, I applied a primer designed for glossy or laminate surfaces. I used a paint tray and a brush to apply it evenly, making sure to cover every part of the furniture. I let the primer dry for a few hours before applying the paint. This step is essential because it ensures that the paint sticks to the surface and doesn’t flake or chip later on.
Before painting, use a degreaser or dish soap to clean the surface, sand with 120-grit sandpaper, and apply a primer designed for glossy or laminate surfaces. This ensures the paint adheres properly and lasts longer.
“I still remember the moment I first looked at my IKEA Lack table and felt that familiar mix of frustration and determination.”— Flipper Lane editors
Painting Techniques That Work for IKEA Laminate

I used a brush to apply the paint, but I found that using a small foam roller made the job easier and faster. I applied the paint in thin, even layers, making sure to cover every part of the furniture. I also worked in a well-ventilated area to avoid breathing in the fumes and kept the surface dry while the paint was drying.
I used a technique called 'wet-on-wet' painting, where I applied the paint in quick succession before the first coat had a chance to dry. This helped create a smooth, even finish without any brush strokes or streaks. I used a brush to apply the first coat and then a foam roller for the second and third coats. I found that this technique gave the best results and made the paint job look more professional.
After painting, I let the furniture dry completely before handling it. I used a clean cloth to wipe away any excess paint and made sure the surface was smooth and even. I also used a clear topcoat to protect the paint and make it more durable. This step was optional, but I found it helped the paint last longer and made it easier to clean.
Finishing Touches and Maintenance Tips
Once the paint was dry, I applied a clear topcoat to protect the surface and make it more durable. I used a water-based, clear acrylic topcoat that dried quickly and didn’t leave any residue on the surface. This step helped the paint last longer and made it easier to clean.
I also made sure to maintain the furniture by wiping it down with a damp cloth and avoiding harsh cleaners or abrasive materials. I found that using a mild dish soap solution was the best way to clean the surface without damaging the paint. I also avoided exposing the furniture to direct sunlight or heat sources, which could cause the paint to fade or crack over time.
The final result was a table that looked brand new and felt like it had always been part of my home. It was a small investment in time and money that paid off in a big way. I wouldn’t say it’s the best thing I’ve ever done, but I’d definitely do it again if I needed to update my furniture.
⭐ Classic
The traditional approach: sand, prime, paint, and topcoat for a smooth, even finish.
💰 Budget
Use a cheaper primer and paint, and skip the topcoat to save money while still achieving a decent finish.
⚡ Extra-Fast
Use a spray paint designed for furniture and skip the sanding step for a quicker, albeit less durable, result.
✨ Depth
Add a second coat of paint and use a darker shade for a more dramatic, eye-catching look.
🥗 Light
Use a light-colored paint and skip the topcoat for a subtle, modern look that's easy to maintain.
| The mistake | Why it happens | The fix |
|---|---|---|
| Skipping the sanding step | The paint won’t adhere properly to the glossy surface, leading to peeling and flaking. | Sand the surface with 120-grit sandpaper before applying primer and paint. |
| Using the wrong type of paint | Oil-based or low-quality paints may not stick to the laminate surface, resulting in an uneven or flaky finish. | Use a water-based primer and a high-quality acrylic latex paint designed for glossy surfaces. |
| Not allowing the primer and paint to dry completely | Applying a second coat before the previous one is fully dry can cause the paint to become streaky or uneven. | Wait for the primer and each coat of paint to dry completely before applying the next coat. |
| Using too much paint in one coat | Applying too much paint at once can lead to drips, streaks, and an uneven finish. | Apply thin, even coats of paint and allow each coat to dry before applying the next one. |
Materials & Tools tap to check off
- 1 can Water-based primer (e.g., Zinsser Bulls Eye 1-2-3)
- 1 can Acrylic latex paint (e.g., Sherwin-Williams Emerald)
- 2 pieces Sandpaper (120 grit)
- 1 can Clear topcoat (e.g., water-based acrylic)
- 2 pieces Paint trays
- 1 roll Foam roller
- 1 set Brushes (1-inch and 2-inch)
- 1 bottle Degreaser or dish soap (for cleaning)
Method tap a step when done
- Clean the surface of the furniture using a degreaser or dish soap solution, then wipe it dry.
- Sand the surface with 120-grit sandpaper, working in circular motions to create a texture for the primer to adhere to.
- Wipe away any dust or debris with a dry cloth.
- Apply the primer using a paint tray and a brush or foam roller, ensuring even coverage.
- Let the primer dry completely for 2–4 hours.
- Apply the paint in thin, even coats using a brush or foam roller, allowing each coat to dry before applying the next. Use 2–3 coats for best results.
- Once the paint is dry, apply a clear topcoat to protect the surface and enhance durability.
Key Facts
Cheap Painting Ikea Laminate Furniture
Common Questions
Can I paint IKEA laminate furniture without sanding?
What is the best paint to use on IKEA laminate furniture?
How long does the paint last on IKEA laminate furniture?
Can I use spray paint on IKEA laminate furniture?
References
- How To Paint Laminate Floors - Free To Anyone (mobile.thisis.gwu.edu)
- Painting, Furniture, and Decorative Arts from the Kaufman Collection (shop.nga.gov)
Cite this guide
Flipper Lane (2026). Cheap Painting Ikea Laminate Furniture. https://flipperlane.com/cheap-painting-ikea-laminate-furniture/
Feel free to cite or share this guide.