
Beginner Chalk Paint Techniques For Picture Frames
📖 Table of Contents
I remember the first time I painted a picture frame with chalk paint—it felt like magic. I had a dusty, outdated frame from my grandmother’s attic, and after just a few hours of work, it looked brand new. I didn’t know much about chalk paint techniques for picture frames, but I was determined to learn, and I ended up falling in love with the process. It wasn’t just about making the frame look pretty; it was about transforming something old into something that felt personal and meaningful.
What I didn’t realize at first was how accessible chalk paint could be, even for someone like me who had never painted before. I picked up a small set of chalk paints, a brush, and some sandpaper, and I started experimenting. I learned the hard way that skipping the sanding step would leave my frame looking uneven, but once I got the hang of it, the results were stunning. Chalk paint techniques for picture frames didn’t feel like a daunting task anymore; instead, they became a fun and satisfying hobby.
Now, years later, I’ve painted dozens of frames, and I’ve learned so much about what works and what doesn’t. I’ve discovered that the key to success lies in preparation, patience, and a few simple tricks. If you’re a beginner looking to try chalk paint techniques for picture frames, this guide is for you. Whether you’re updating your home or creating a custom gift, you’ll find all the details you need to get started and finish with confidence.
Why You'll Love This Guide to Beginner Chalk Paint Techniques for Picture Frames
- Easy-to-follow techniques that require no prior painting experience
- Detailed steps that ensure your finished frames look professional
- Cost-effective and eco-friendly method for updating your home decor
- A creative way to repurpose old or unused picture frames
Why Chalk Paint is Perfect for Picture Frames
As of August 2026, one of the best things about chalk paint is how well it works on wood surfaces. Unlike other types of paint, it doesn’t require a primer, which makes it ideal for beginners. I’ve used it on countless frames, and the result is always a soft, velvety finish that looks elegant and timeless.
I once painted a frame that had been left in a garage for years, and the paint covered the imperfections so well that it looked like it had always been that way. It’s amazing how much of a difference a little chalk paint can make. The key is to prepare the surface properly, which I’ll explain in the next section.
Another reason I love using chalk paint on picture frames is that it’s easy to customize. You can mix different colors to create unique combinations or even add decorative accents like wax or stencils. This flexibility makes it a great option if you’re looking to add a personal touch to your frames.
Before painting, sand the frame lightly to remove any old paint or dirt. This helps the chalk paint adhere better and results in a smoother finish.
Part of our Chalk paint guide.
The Essential Tools and Materials
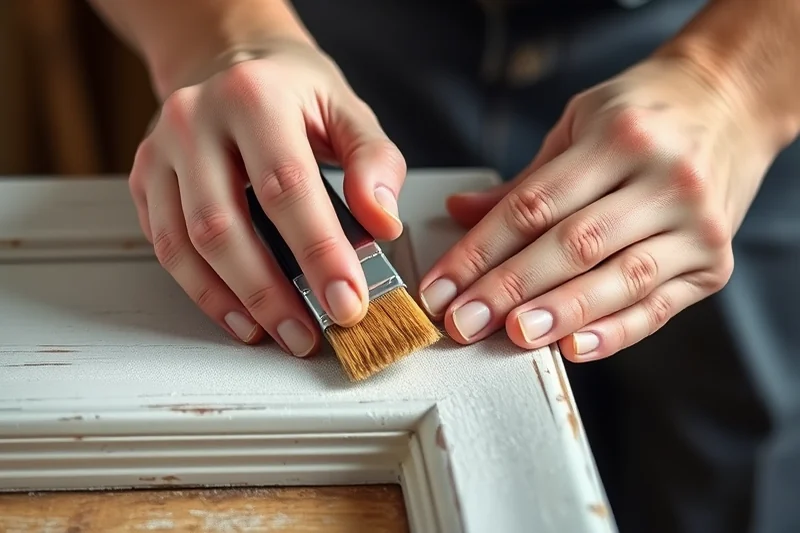
The most important item is, of course, the chalk paint itself. I recommend starting with a basic set that includes a few neutral colors like white, gray, and beige. These are versatile and can be mixed together to create new shades. I’ve used these colors on multiple frames and found that they work well for both modern and traditional styles.[1]
In addition to paint, you’ll need a brush. A small, flat brush works best for covering the frame evenly. I’ve tried using different types of brushes, and I found that a brush with soft bristles gives the best results. It’s also a good idea to have a small container for mixing paint colors if you want to create custom shades.
Don’t forget the finishing touches. A wax or sealant will protect your paint and give it a nice sheen. I’ve used a clear wax on most of my frames, and it’s been a game-changer. It not only preserves the paint but also adds a slight glow that makes the frame look more finished.
The right tools and materials make all the difference in achieving a professional-looking finish.
Related: Quick workshop chalk paint techniques
Related: Quick youtube chalk paint techniques
Related: Fast chalk paint furniture painting techniques
Related: Fast chalk paint finishing techniques
Related: Chalk paint furniture painting techniques how to choose
Related: Chalk Paint Vs Milk Paint
Related: Workshop Chalk Paint Techniques
Related: Chalk Paint Techniques For Picture Frames Near Me
Step-by-Step Guide to Painting a Picture Frame
First, make sure the frame is clean and dry. I always start by wiping it down with a damp cloth to remove any dust or dirt. This helps the paint stick better and prevents the frame from looking patchy. I’ve learned the hard way that skipping this step can lead to an uneven finish.
Next, apply the paint in thin, even strokes. I recommend painting the frame in sections to avoid the paint from drying too quickly. I’ve found that working in small sections helps me maintain control and ensures a smooth finish. After applying the first coat, I let it dry for about 15 minutes before moving on to the next step.[2]
Once the paint is dry, apply a second coat to ensure even coverage. I usually wait 15–20 minutes between coats, and I’ve noticed that this makes a big difference in the final appearance. After the second coat is dry, I apply a thin layer of wax or sealant to protect the paint and give it a nice sheen.[3]
Divide the frame into sections and paint them one at a time. This gives you better control and helps prevent the paint from drying too quickly.
“I remember the first time I painted a picture frame with chalk paint—it felt like magic.”— Flipper Lane editors
Creative Ways to Customize Your Frames
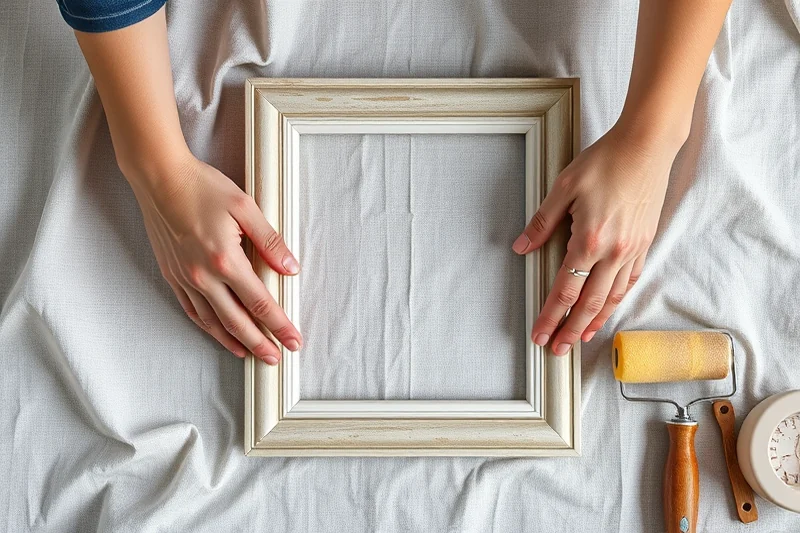
One of my favorite techniques is using stencils to add decorative patterns to the frame. I’ve used simple geometric shapes and even tried creating custom designs using stencils I made myself. It’s a fun way to add a personal touch to your frames and make them stand out.
Another idea is to experiment with different color combinations. I’ve tried mixing white and gray to create a soft, modern look or using bold colors like blue and green to make the frame more vibrant. Don’t be afraid to play around with different shades and see what works best for your space.
You can also use wax or other finishing products to add texture or dimension to your frame. I’ve experimented with using different types of wax, and I found that some give the frame a more natural look while others add a glossy sheen. It’s a great way to personalize your frames and make them truly one-of-a-kind.
Tips for Achieving the Best Results
One of the most important things I’ve learned is to always work in a well-ventilated area. I’ve painted frames indoors and outdoors, and I found that painting in a well-ventilated space helps the paint dry faster and prevents any unpleasant odors from lingering.
Another tip is to avoid overpainting. I’ve made the mistake of applying too much paint in one go, and it ended up looking thick and uneven. I’ve found that applying thin, even coats and letting each coat dry before moving on to the next is the best approach.
Lastly, don’t forget to clean your tools properly after painting. I always rinse my brushes immediately after use to prevent the paint from drying in them. This not only helps maintain the quality of your tools but also makes cleaning up much easier.
⭐ Classic
A timeless approach using traditional chalk paint techniques and a clear wax finish.
💰 Budget
An affordable version using fewer materials and simple techniques that still yield great results.
⚡ Extra-Fast
A quicker method that skips some of the more time-consuming steps while still producing a professional finish.
✨ Depth
A technique that adds dimension and texture by experimenting with multiple layers and finishes.
🥗 Light
A version that uses lighter colors and minimal layers for a soft, minimalist look.
| The mistake | Why it happens | The fix |
|---|---|---|
| Skipping the sanding step | This can cause the paint to adhere unevenly, resulting in a rough or patchy finish. | Always sand the frame lightly before painting to ensure a smooth, even surface. |
| Applying too much paint in one go | This can make the paint look thick and uneven, especially if it dries too quickly. | Apply thin, even coats and let each coat dry completely before moving on to the next. |
| Not working in a well-ventilated area | This can cause the paint to dry slowly and may lead to unpleasant odors. | Always paint in a well-ventilated space to ensure a quicker and cleaner process. |
| Using the wrong type of brush | This can affect the quality of the finish, making it look uneven or rough. | Use a small, flat brush with soft bristles for the best results. |
Materials & Tools tap to check off
- 1 lb Chalk Paint (choose your colors)
- ½ cup Wax or Sealant
- Brushes
Method tap a step when done
- Prepare the picture frame by cleaning it and sanding it lightly to ensure the paint adheres properly.
- Mix your chalk paint colors if desired, using a small container to create custom shades.
- Apply the first coat of paint to the frame in thin, even strokes, working in sections to avoid the paint from drying too quickly.
- Allow the first coat to dry completely, which usually takes about 15–20 minutes.
- Apply a second coat of paint, ensuring even coverage and allowing it to dry completely.
- Once the paint is dry, apply a thin layer of wax or sealant to protect the finish and give it a nice sheen.
Key Facts
Beginner Chalk Paint Techniques For Picture Frames
Common Questions
Do I need to use a primer before painting with chalk paint?
How long does chalk paint take to dry?
Can I mix different colors of chalk paint together?
What type of brush should I use for painting with chalk paint?
References
- How Mark Rothko Made Paintings on Paper - National Gallery of Art (nga.gov)
- Technique | The School of Athens | Raphael - Columbia University (projects.mcah.columbia.edu)
- Chalkboard (studiochalkboard.evansville.edu)
Cite this guide
Flipper Lane (2026). Beginner Chalk Paint Techniques For Picture Frames. https://flipperlane.com/beginner-chalk-paint-techniques-for-picture-frames/
Feel free to cite or share this guide.