
Furniture Flipping & Painting Furniture Color Checklist
📖 Table of Contents
- Why a Color Checklist Matters More Than You Think
- How to Prep Your Furniture for Painting
- Choosing the Right Paint and Finish
- Painting Techniques That Make a Difference
- Topcoating for Long-Lasting Results
- How to Choose the Right Color for Your Space
- How to Troubleshoot Common Painting Problems
- Make It Your Way
- Frequently Asked Questions
There’s something oddly satisfying about giving new life to a piece of furniture that’s seen better days. Last summer, I bought a beat-up oak dresser from a neighbor’s garage sale for $20, and after a weekend of sanding, painting, and sealing, it became the centerpiece of my living room. That experience taught me that furniture flipping doesn’t require a degree in interior design or a six-figure budget — just the right tools, a bit of patience, and a color checklist that works. If you’re looking to transform your space with affordable, DIY furniture, this guide will walk you through every step.[1]
I’ve spent the last three years flipping furniture — from thrift-store bookshelves to IKEA dressers — and I’ve learned that the key to success lies in preparation. One of the most overlooked aspects of furniture painting is choosing the right color. A poorly chosen shade can make a room feel smaller, outdated, or just plain unbalanced. That’s why I’ve created a furniture flipping & painting furniture color checklist that’s become my go-to resource for every project. It’s not just about aesthetics; it’s about creating a piece that lasts and looks great for years to come.
This guide isn’t about quick fixes or trendy hacks that fade with time. It’s about real, sustainable transformations that take a little effort but deliver a lot of payoff. Whether you’re painting a single chair or an entire set of cabinets, having a color checklist and a clear plan will save you time, money, and a lot of frustration. I’ll walk you through how to pick the perfect color, how to prep your furniture properly. How to finish the job so it looks like it came out of a showroom — all on a budget that won’t break the bank.
Why You'll Love This Furniture Flipping & Painting Furniture Color Checklist
- Get precise color guidance to avoid costly mistakes.
- Save time with a structured, step-by-step approach.
- Ensure your furniture looks professional and lasts longer.
- Transform thrift-store finds into high-end pieces for under $100.
Why a Color Checklist Matters More Than You Think
As of September 2026, Choosing the right color for furniture is more than just picking your favorite shade. It’s about understanding how light, room size, and existing decor interact with the color you select. I once painted a side table a deep navy only to realize it made the room feel darker and more cramped. A checklist prevents these mistakes by guiding you through color theory, lighting conditions, and how different finishes affect the final look.
I use a checklist that includes questions like: Does this color contrast well with the room’s flooring and walls? Will it hold up to daily wear and tear? Is the finish suitable for the furniture’s function? The answers to these questions help avoid costly errors and ensure the paint complements the space rather than clashing with it.
A color checklist also helps you test shades before committing. I’ve used color swatches on the wall to see how they look in different lighting throughout the day. It’s a small step, but it can make a huge difference in the final result. With a checklist, you’re not guessing — you’re planning.
Before committing to a color, use swatches or small samples on your wall and furniture to see how they look in different lighting. I’ve saved myself hundreds of dollars this way.
Part of our Furniture flipping painting furniture color style ideas guide.
How to Prep Your Furniture for Painting
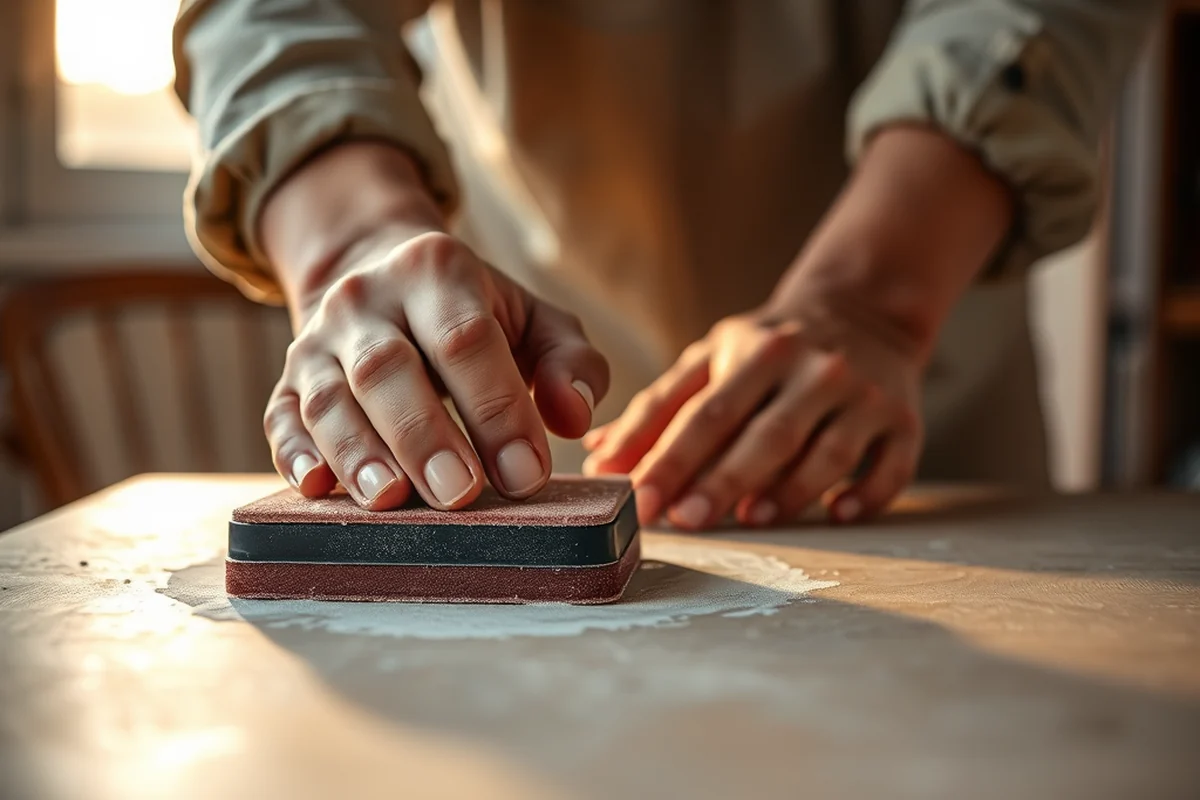
No matter how good your paint is, if your furniture isn’t prepped correctly, the finish will look uneven or flake off quickly. I start by cleaning the surface with a degreaser or trisodium phosphate (TSP) to remove grease, grime, and old finishes. This step is crucial because any residue left on the furniture can prevent the paint from adhering properly.
Next, I sand the surface with 120-grit sandpaper to create a smooth, even base. I always sand in the direction of the wood grain to avoid creating scratches that won’t be visible under the paint. After sanding, I wipe the surface down with a damp cloth to remove all the dust — even a small amount can cause the paint to look cloudy or bumpy.[2]
Finally, I apply a primer. I’ve found that using a water-based primer works best for most furniture projects. It helps the paint stick better and reduces the number of coats needed. I always let the primer dry completely before moving on to painting, which usually takes about 2–3 hours depending on the room’s temperature and humidity.
Preparation is the secret to a flawless finish — don’t skip it.
Related: Living room paint colors
Related: Affordable Furniture Flipping & Painting Furniture Color
Choosing the Right Paint and Finish
The type of paint you use can make or break your project. I prefer using water-based (latex) paint for most furniture because it’s easy to apply, dries quickly, and is less smelly than oil-based alternatives. It’s also more forgiving if you make a mistake — you can just sand it down and repaint the area.
For furniture that’s used frequently, like chairs or tables, I recommend using a semi-gloss or high-gloss finish. These finishes are more durable and easier to clean. I’ve found that semi-gloss is a good all-around choice for most furniture pieces because it gives a nice sheen without being too reflective.[3]
I always test the paint on a small area before painting the whole piece. I’ve made the mistake of using a paint that didn’t match the furniture’s texture, and it looked off. Testing ensures that the paint will work with the furniture’s surface and that the finish will look the way you want.
Before painting the whole piece, apply the paint to a small section and wait for it to dry. This helps you see how the finish looks and feels in real life.
“There’s something oddly satisfying about giving new life to a piece of furniture that’s seen better days.”— Flipper Lane editors
Related: Best kitchen paint colors
Painting Techniques That Make a Difference

I’ve tried everything from brush painting to spray painting, and I’ve found that using a combination of both works best. For larger surfaces, I use a spray gun or aerosol can for an even coat. It’s faster and covers more area with less effort. For edges and corners, I use a small brush to get into tight spots and avoid brush strokes.
I always apply the paint in thin, even coats. Applying too much paint at once can lead to drips, bubbles, or an uneven finish. I wait for each coat to dry completely before applying the next one. I usually apply two coats of paint, and sometimes three if the furniture is a dark color or I want a more vibrant look.
After painting, I lightly sand the surface with 220-grit sandpaper to smooth out any imperfections. This step is crucial for achieving a professional-looking finish. I wipe away the dust with a damp cloth and then apply a clear topcoat to protect the paint and enhance the finish.[4]
Related: Living room paint color ideas
Topcoating for Long-Lasting Results
After the paint has dried completely, I apply a clear topcoat to protect the surface. I’ve used both water-based and oil-based topcoats, and I’ve found that water-based topcoats are easier to apply and dry faster. They also don’t yellow over time like some oil-based options.
I always apply the topcoat in a well-ventilated area and avoid applying it in direct sunlight or in a humid room. I’ve had issues with the topcoat not drying properly in high humidity, which can lead to a cloudy or streaky finish. I wait for the topcoat to dry completely before moving the furniture back into its place.
The result is a piece of furniture that looks brand new and is resistant to scratches, stains, and moisture. I’ve had my painted furniture last for years without peeling or chipping, and I attribute that to the proper application of a topcoat. It’s a small step, but it makes a big difference in the longevity of your project.
Related: Eco friendly furniture polish
How to Choose the Right Color for Your Space
Lighting is one of the biggest factors in choosing a color for furniture. I’ve found that lighter colors can make a room feel more open and airy, while darker colors can create a sense of intimacy. I always consider the natural light in the room and how the furniture will be used throughout the day.
I also take into account the room’s existing decor. I try to choose a color that complements the room’s color palette and doesn’t clash with the other furniture or wall colors. For example, if the room has a lot of neutral tones, I might go with a bold accent color for the furniture to add visual interest.
Finally, I consider the furniture’s function. If it’s a piece that will be used daily, like a dining table or a chair, I choose a color that’s easy to clean and won’t show wear as easily. I’ve learned that darker colors hide scratches and stains better than lighter ones, which is a consideration I always make when choosing a shade.
Light, color, and function — they all matter in the final look.
Related: What is a good paint color for home office
How to Troubleshoot Common Painting Problems
Even with the best preparation, mistakes can happen. One common issue is paint that doesn’t stick properly. I’ve had this happen when I skipped the primer step, and the paint came off after just a few weeks. To fix this, I sand the surface, apply a primer, and repaint the area.
Another issue is paint that dries too quickly, leaving brush strokes or an uneven finish. I’ve found that using a paint thinner or a small amount of water (for water-based paint) can help slow down the drying time and allow for a smoother application. I always test this on a small area first to make sure it works before applying it to the whole piece.
If the paint looks cloudy or streaky after drying, it’s often due to improper drying conditions. I’ve had this happen when I painted in a humid room or in direct sunlight. To fix this, I sand the surface lightly and apply a topcoat to even out the finish. A little patience goes a long way in avoiding these issues.
💰 Budget Build
Repurpose old furniture with minimal cost — use affordable paints and basic tools to get a fresh look.
⏰ Weekend Version
Complete a simple furniture painting project in one weekend with easy steps and prepped materials.
✨ Upgraded Finish
Add a professional touch with high-quality paint, a durable topcoat, and precise color matching.
🛋️ Small-Space Adaptation
Paint furniture to fit compact spaces — choose light colors and streamlined designs for maximum impact.
🏠 Rental-Safe Option
Use removable paint or temporary finishes that won’t damage your rental property or leave a mark.
| The mistake | Why it happens | The fix |
|---|---|---|
| Skipping the primer step | Paint may not adhere properly, leading to peeling or flaking over time. | Always apply a primer before painting to ensure proper adhesion and a longer-lasting finish. |
| Applying too much paint at once | This can lead to drips, bubbles, or an uneven finish. | Apply paint in thin, even coats and wait for each coat to dry before applying the next one. |
| Painting in the wrong lighting conditions | Paint can look different in different lighting, and improper conditions can cause the paint to dry unevenly. | Choose a well-ventilated area with even lighting and avoid painting in direct sunlight or high humidity. |
| Not testing the paint color first | A color that looks good on the swatch may not match the room’s lighting or other decor. | Test the paint on a small section of the furniture and wait for it to dry before committing to the color. |
Furniture Flipping & Painting Furniture Color Checklist
Common Questions
What kind of paint is best for furniture flipping?
How many coats of paint should I apply?
What should I do if the paint looks streaky or cloudy after drying?
Can I paint over an old painted surface?
References
Cite this guide
Flipper Lane (2026). Furniture Flipping & Painting Furniture Color Checklist. https://flipperlane.com/furniture-flipping-painting-furniture-color-checklist/
Feel free to cite or share this guide.